- Home
- About
- Blog
- For Parents
-
Corners
- Allison’s Corner
- Amber’s Category
- Andrea’s Corner
- Ashley’s Corner
- Brandi Jo’s Corner
- Brittany’s Corner
- Brooke’s Corner
- Catrina’s Corner
- Conservation
- Desiree’s Corner
- Emily’s Corner
- Erica’s Corner
- Erin’s Corner
- Heather’s Corner
- Ivory’s Corner
- Jeana’s Corner
- Katie’s Corner
- Kelly’s Corner
- Kelsey’s Corner
- Kendra’s Corner
- Liberty’s Corner
- Lisa’s Corner
- Meagan’s Corner
- Melissa’s Corner
- Mimi’s Corner
- Morgan’s Corner
- Nicole’s Corner
- Sarah’s Corner
- Savannah’s Corner
- Shannon’s Blog
- Sharon’s Corner
- Sherri’s Corner
- Tara’s Corner
- Contact
- Guest Post
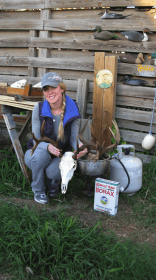
DIY European Mount
You have been hunting and have harvested an animal that you want to mount! Taxidermy is the final act! Preserving a meaningful trophy closes the circle and allows someone to complete the overall experience of taking a game animal. A European mount is a great entry point for a hunter who wants to test the waters and take a trophy from the field to the living room wall. Ready to take the plunge? The following bullet points below provide the step by step process for producing a skull mount of your next trophy.
…
Supplies: Borax soap, rubber gloves, large pot, propane burner with tank, knives, wire, linseed oil, tape, small paintbrush, old towel, cream hair bleach, and super glue
…
First things first, you have to go shoot an animal, ha ha! Ok, after harvesting your animal you have to skin out the skull. I wear gloves and use a small sharp knife and Borax soap to skin skulls. Borax absorbs fluids and helps with gripping the skin. Just sprinkle a little bit of the Borax on the flesh part of the skin while you skin it out with the knife.
…
The next step is boiling the skull. This is stinky and I would greatly recommend doing it outside on a propane burner. Fill the pot with the skull and water and put it on the burner. I also add a little bit of Borax to the boiling water. Boil the skull for 2 to 3 hours and then leave it setting in the water for a while, leaving it in helps soak off last bit of meat. Now take the skull out of the water and lay it out on a towel. Take the wire and start scrapping and getting all the stuff out of the inside of the skull. Sometimes you may need to repeat the boiling process. After the boiling and scraping of the inside I let the skull air dry for a few days.
…
Now it’s time to start bleaching. If it is a deer I tape off the antlers so that the bleach does not discolor them. Then mix the bleach mixture and paint it on the skull with the paint brush. I usually wear old clothes when I am bleaching because I don’t want to ruin good stuff. The sun helps activate the bleach so try and do this step on a sunny day. You will need to repeat the bleaching process depending on the shade of white you desire. If you accidentally bleach the antlers you can fix it with wood stain.
…
Now rinse off the skull and super glue in any teeth that may have fallen out during the process. If your mount has antlers or horns you can oil them with linseed oil to enhance their natural color. Display as desired….you are done!
…
Start with the hunt and end with the mount, Taxidermy is the end of the experience. Doing it yourself allows you to finish the processes without any one else’s hands being involved. This is why people reload ammo and process their own meat. It is a very rewarding feeling to have your hands in every aspect of harvesting an animal! From the hunt to the trophy on the wall, it is an awesome feeling to do it all yourself!
Feb 05, 2013 | Category: Blog | Comments: 3
Nena, this is some great advice! i was really apprehensive about trying my hand at something like this and i had no idea where to start. im going to have to look into making a cherry wood backing. what would be the best way to mount it? drill a hole near the rear of the skull and hang it?
You should totally try doing it yourself! I don’t drill the scull. I just weave wire through the hole in the scull where the spine would connect. If you look at the back of the scull you will see two holes that are perfect to wire. Good luck 🙂
Thanks for the instructions! What strength hair bleach do you use?