- Home
- About
- Blog
- For Parents
-
Corners
- Allison’s Corner
- Amber’s Category
- Andrea’s Corner
- Ashley’s Corner
- Brandi Jo’s Corner
- Brittany’s Corner
- Brooke’s Corner
- Catrina’s Corner
- Conservation
- Desiree’s Corner
- Emily’s Corner
- Erica’s Corner
- Erin’s Corner
- Heather’s Corner
- Ivory’s Corner
- Jeana’s Corner
- Katie’s Corner
- Kelly’s Corner
- Kelsey’s Corner
- Kendra’s Corner
- Liberty’s Corner
- Lisa’s Corner
- Meagan’s Corner
- Melissa’s Corner
- Mimi’s Corner
- Morgan’s Corner
- Nicole’s Corner
- Sarah’s Corner
- Savannah’s Corner
- Shannon’s Blog
- Sharon’s Corner
- Sherri’s Corner
- Tara’s Corner
- Contact
- Guest Post
Tips for Trail Cameras
Once again, it’s time to get your trail cameras out and see what’s growing. Trail cameras are awesome to have when scouting out hunting spots. They provide so much information about each area. Have the fawns dropped yet? Did the big buck you were hunting last year survive? And how are his antlers shaping up for this year? Are there new animals that weren’t here last year? Do you have a rodent problem? Are the deer and turkey using your feeders? Trail cameras can assist in answering all these questions.
–
When putting out my trail cams, I have a few goals in mind. My first objective is to identify how much activity a given area is getting. This lets me know if what animals I will be dealing with, if there is a buck worth taking, and how often I am likely to run out of feed. My second objective is to identify travel routes and times. This lets me know when my chances are best at bagging the target buck.
–
I have several trail cameras that I put out and on different properties. This means lots of cameras, SD cards, batteries, driving, and usually, confusion. To try and cut down on the confusion, I’ve kind of used my OCD to my advantage. I number every camera and SD card. I do this using a sharpie. It’s simple, yet effective. Another idea, if you deploy as many cameras as I do, may be to use GPS to track your cameras, or even simpler, a mapping system. Jot down the location so that you won’t have the frustration of losing a camera.
–
As the old saying goes, “luck is where preparation meets opportunity”. There is no place where this more true than it is in hunting trophy whitetails. Using a trail camera properly will help you better prepare for your hunts and choose ambush locations that can provide more opportunities to see big bucks. In order for your trail camera to provide you with the best and most accurate pictures, it is essential that you set up the camera correctly. Here are some tips for getting the most out of your trail cameras and that just may help you take home the trophy of a lifetime:
–
Updating- many newer cameras come with software that run them, that needs to be updated. You should do this before putting the camera out. To find out if your camera has software or if there are any updates available, just go to the website for your camera manufacturer and see if your camera has any firmware updates.
–
Use good quality batteries, such as lithium Energizer or Duracell brand. Use high quality SD cards. SD cards must be at least a 2 gigabyte. If you have video capabilities, a 4GB would be necessary.
–
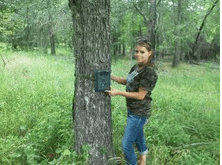
Face your camera in a Northward facing or Southward facing position. This will help prevent the sun from backlighting your subject and making it a non-descript silhouette in the photo. Place the camera on a tree about waist high or slightly lower, and make sure it is level with the ground. Again, don’t face the camera directly west or east. The sun will affect the quality of your pictures (wash them out) and the heat may trigger the infra-red sensors.
Aug 04, 2013 | Category: Blog | Comments: 1
Interesting tips out there, I never had the opportunity to use a trail camera though. I’d like to try this for sure after some time.
Regards
Easton